


Get Your Sprayer Ready For Spring
Make sure your tank is free of cracks or fractures to avoid loss of product.
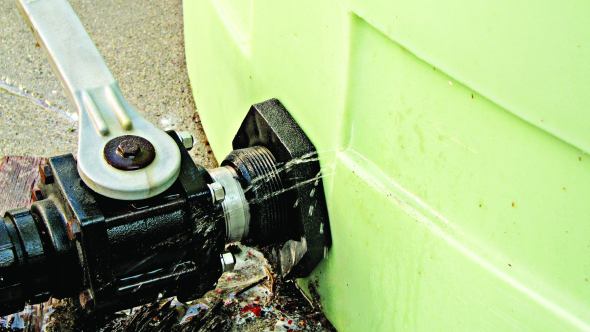
Photo credit: Fred Whitford, Purdue University
As winter transitions into spring, checking on all of your equipment for any wear and tear it may have incurred during the colder months is paramount to ensure proper functionality. Spray equipment is no different, and proper cleaning and calibration are necessary to guarantee you are applying the correct rate of product to your crops.
Dwane Miller, Extension Educator with Penn State University, is an expert in the area of sprayer technology, and offers guidance on what to look for when you take your sprayer out in the spring, how to properly clean your equipment, and, finally, how to calibrate your sprayer to ensure its effectiveness.
Assessing Damages
According to Miller, one of the first things to do before you operate your spray equipment after winter is check your tank for any obvious signs of damage. After that, he suggests looking at all of your hoses to make sure that any water that may have been left over from the previous season didn’t freeze and crack the equipment.
“All of this should be done before you put in any water or start to flush out and pump. This is a great opportunity to physically take a look at the shape of the sprayer to make sure that it’s ready to go,” Miller says.
If your sprayer has a poly tank, there are several methods of checking for damages to your tank. One of which is by “candling” the tank, or inserting a light into the empty tank to illuminate any cracks or “spider webbing” that may have occurred.
Another, perhaps unconventional method of assessing for damage in your tank, is by actually hitting it with a baseball bat to see how it reacts to the blow.
“If the tank cracks, it should not be used. There should be enough flexibility in the tank that you should be able to hit it with a baseball bat and have it flex instead of cracking,” Miller says.
Cleaning Your Equipment
There are a variety of cleaning agents available and recommended for use with different types of chemicals used in your tank, says Miller.
“When in doubt it’s always best to look at your pesticide label for the product that you used most recently and see if there’s a specific cleaning product recommended,” he explains.
“As a general rule, we recommend using regular household ammonia. The recipe is about one quart of ammonia for about every 25 gallons of water.”
To clean the tank, Miller suggests first putting water in the tank, and then flushing the system with that water. He cautions that if there was any type of antifreeze in the system to be sure to flush that out with water before the initial flush out.
Next, agitate the solution between two to five minutes to ensure it is circulating through the plumbing. After that’s been done, shut the system down and let the water stand in the tank for at least two hours, flush the tank again, and rinse it out with water at least once.
For the smaller pieces of equipment such as nozzles, tips, and strainers, using warm soapy water to gently clean them should do the job, Miller says.
Check Your Nozzles
Evaluating the condition of your nozzles is the next step, according to Miller.
“There may have been an issue where you did not clean the nozzle properly or did not use the right tool to clean the nozzle, and you might not know it, but that nozzle might be putting out a significant excess in chemicals or fertilizers. For that reason it’s really important that you look for uniformity in your nozzle output,” he explains.
The general rule of thumb, according to Miller, is that if any nozzle is higher or lower than 10% of your average output, it should be cleaned, or you should think about replacing it.
Another way of assessing nozzle output is by using a pattern check, which is available through sprayer equipment company, TeeJet. Essentially, the pattern check system catches the output for each nozzle, and uses a measuring system with floating balls to assess if any nozzles are putting out more or less product than they should.
A calibration cup, which also can be purchased through TeeJet, also functions in a similar way by catching the output of each nozzle, allowing them to be measured against one another.
Sprayer Calibration Steps
When calibrating a boom sprayer, Dwane Miller, Extension Education with Penn State University, suggests using the 1/128th of an acre calibration method. In this method, the distance you travel is equal to 1/128th of an acre. Because there are 128 ounces in a gallon, the output you measure from each nozzle (in ounces) is equal to gallons per acre. To do the calibration test, you will need a tape measure, calibration cup, stopwatch, and two small flags to mark a start and stop point in the field. Below are the seven steps he provides in order to complete the process:
1. The distance you will travel in the field should be based on your nozzle spacing. You will need to measure your nozzle spacing on the boom, and use a table, such as the one provided in the article here: http://bit.ly/1mhaLs4, to calculate the distance you must travel to cover 1/128th of an acre per nozzle.
Mark off this distance in the field, and allow space for the sprayer to reach full operating speed before reaching the first marker of the test course.
2. Fill the tank half full with water without any pesticides. Make at least two passes over the marked distance with all of the equipment to be used during the application, using the gear and throttle settings that will be used during the actual spraying. Calculate the average time (in seconds) it takes the sprayer to travel the marked distance.
3. Park your tractor and adjust the sprayer pressure to the pressure that will be used for application. Using a calibration cup marked in ounces, catch the output from a single nozzle for the length of the average travel time.
The number of ounces collected from one nozzle is equal to the output of the entire sprayer in gallons per acre. Make sure you’ve checked each nozzle for uniformity.
4. Compare the actual application rate with the recom-mended or intended rate. If the actual rate is more than 5% higher or lower than your intended rate, you’ll have to make adjustments.
5. You can start the adjustments by changing the pressure. Lowering the spray pressure will reduce the spray delivered. Do not vary from the pressure range recommended by the manufacture for the nozzles in use, and remember that higher pressures can increase the potential for drift.
6. Another way to correct the application rate is by changing the travel speed. Slower speeds mean more spray is delivered; faster speeds mean less spray is delivered.
If these changes do not bring the application rate to the desired rate, you may have to select a new set of nozzles with smaller or larger orifices.
Recalibrate the sprayer after making any adjustments.
Subscribe Today For
